這個系列會帶你從無到有打造一個 Discord Bot。這篇是起點,完成後你會有一個在 Discord 上線運作、能回應 Slash Command 的 Bot。
不需要任何 Discord 開發經驗,只需要會用 Node.js 就夠了。
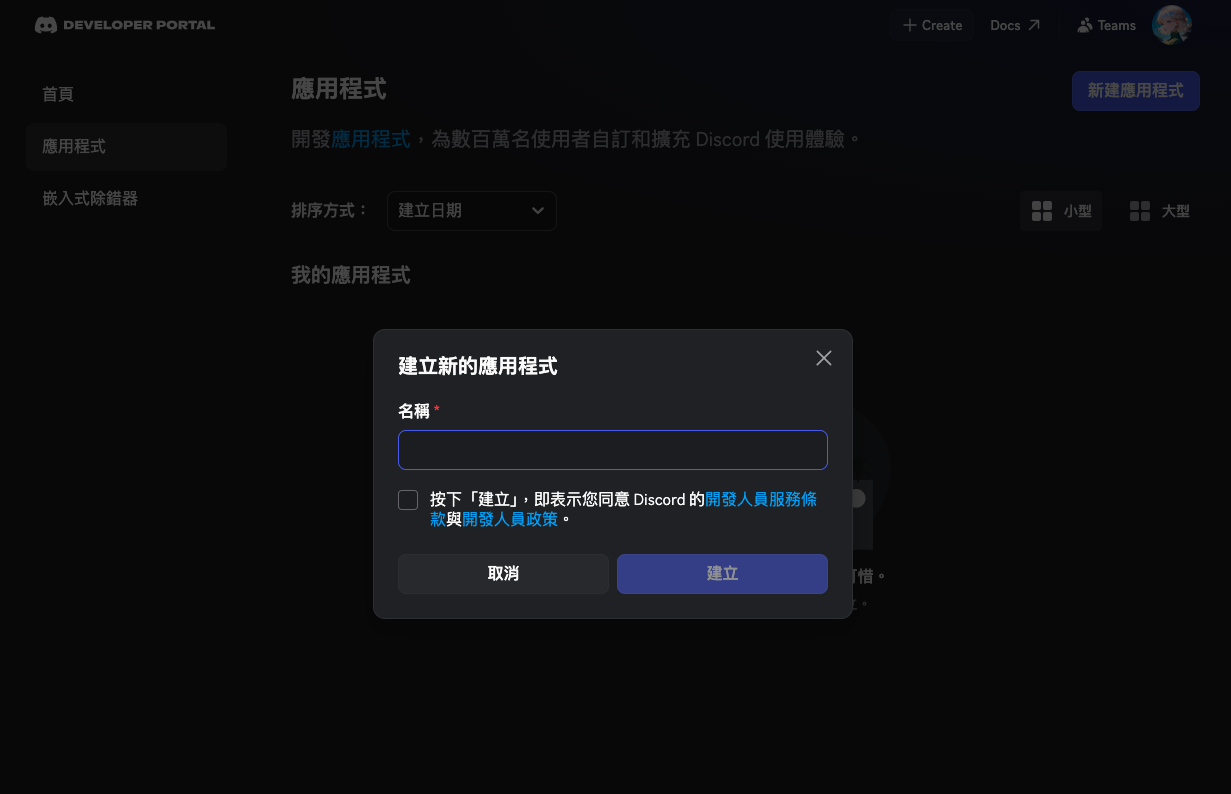
1. 到 Discord Developer Portal 申請 Bot
前往 Discord Developer Portal,登入你的 Discord 帳號。
建立應用程式(Application):
- 點右上角「新建應用程式」(
New Application) - 輸入應用程式名稱(這會是 Bot 在伺服器上顯示的名稱),按「建立」(
Create)
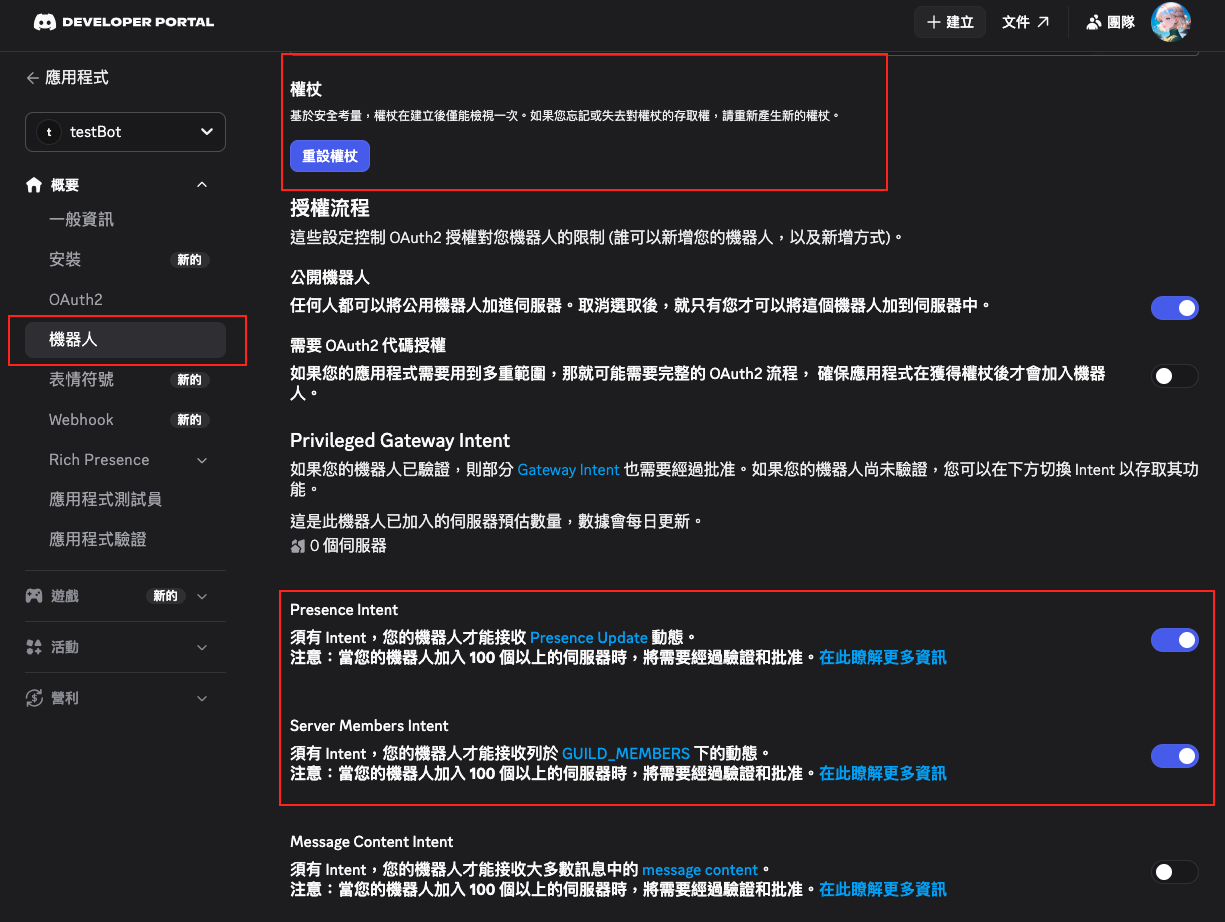
2. 設定權證(Token)與 Privileged Gateway Intents
回到左側選單,點 Bot 頁籤,在這裡完成兩件重要設定:取得權證、開啟需要的 Intents。
取得權證(Token):
- 找到「權證」(
TOKEN)區塊,按「重設權杖」(Reset Token) - 複製這串 Token,先安全保存,稍後貼到你自己的
.env
Token 是 Bot 的登入密鑰,效力等同密碼,不能公開。不要 commit 到 git,不要貼給任何人。
開啟 Privileged Gateway Intents:
往下滑找到 Privileged Gateway Intents,根據需求開啟:
- SERVER MEMBERS INTENT — 讓 Bot 能讀取成員資訊(例如抓成員暱稱、給予身分組)
- MESSAGE CONTENT INTENT — Bot 需要讀取訊息內容時才開,只做 Slash Commands 的話不需要
沒開對應的 Intent,Bot 就算程式碼寫好也接收不到那個 Intent 的事件——這個問題不會噴任何錯誤,只是靜默地沒反應,新手很容易被坑。
3. 邀請 Bot 到伺服器
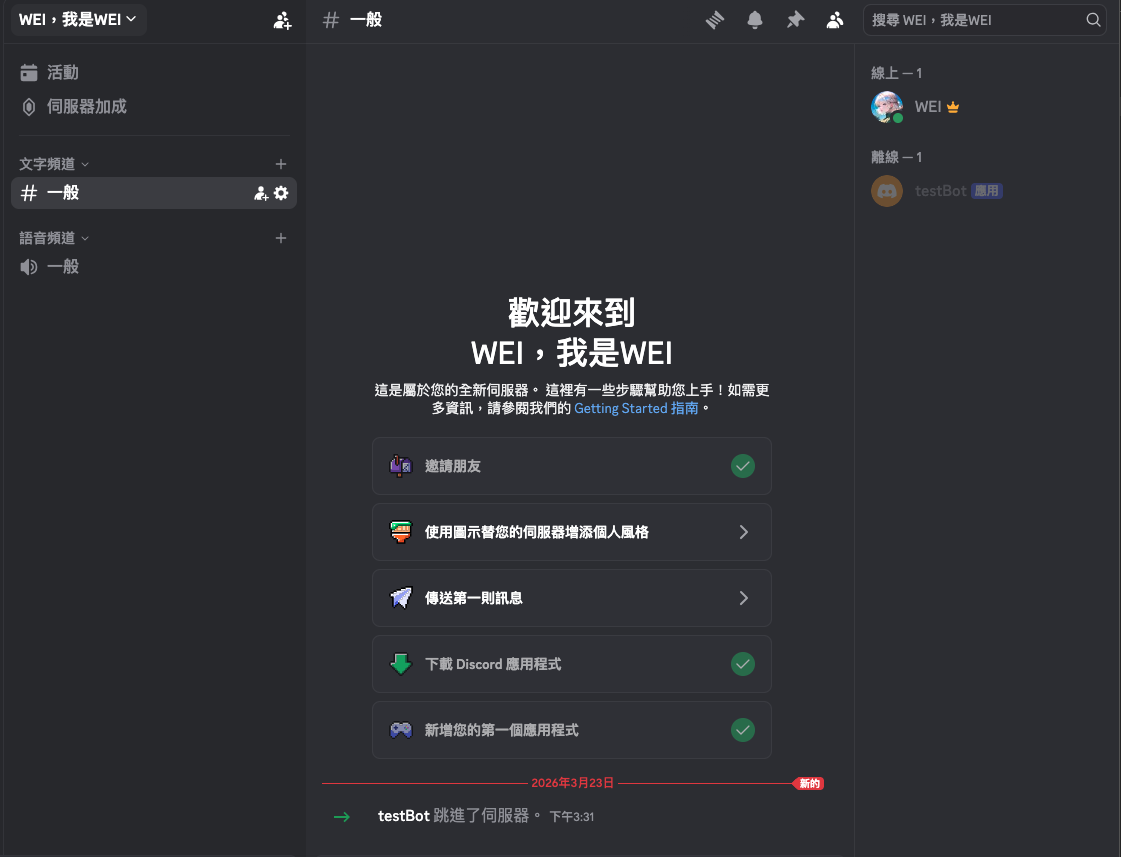
先把 Bot 邀進你的伺服器,後面啟動程式時才看得到它是否真的上線。
回到 Developer Portal,進入左側 OAuth2 → URL Generator:
- SCOPES 勾選
bot和applications.commands - BOT PERMISSIONS 勾選
Administrator
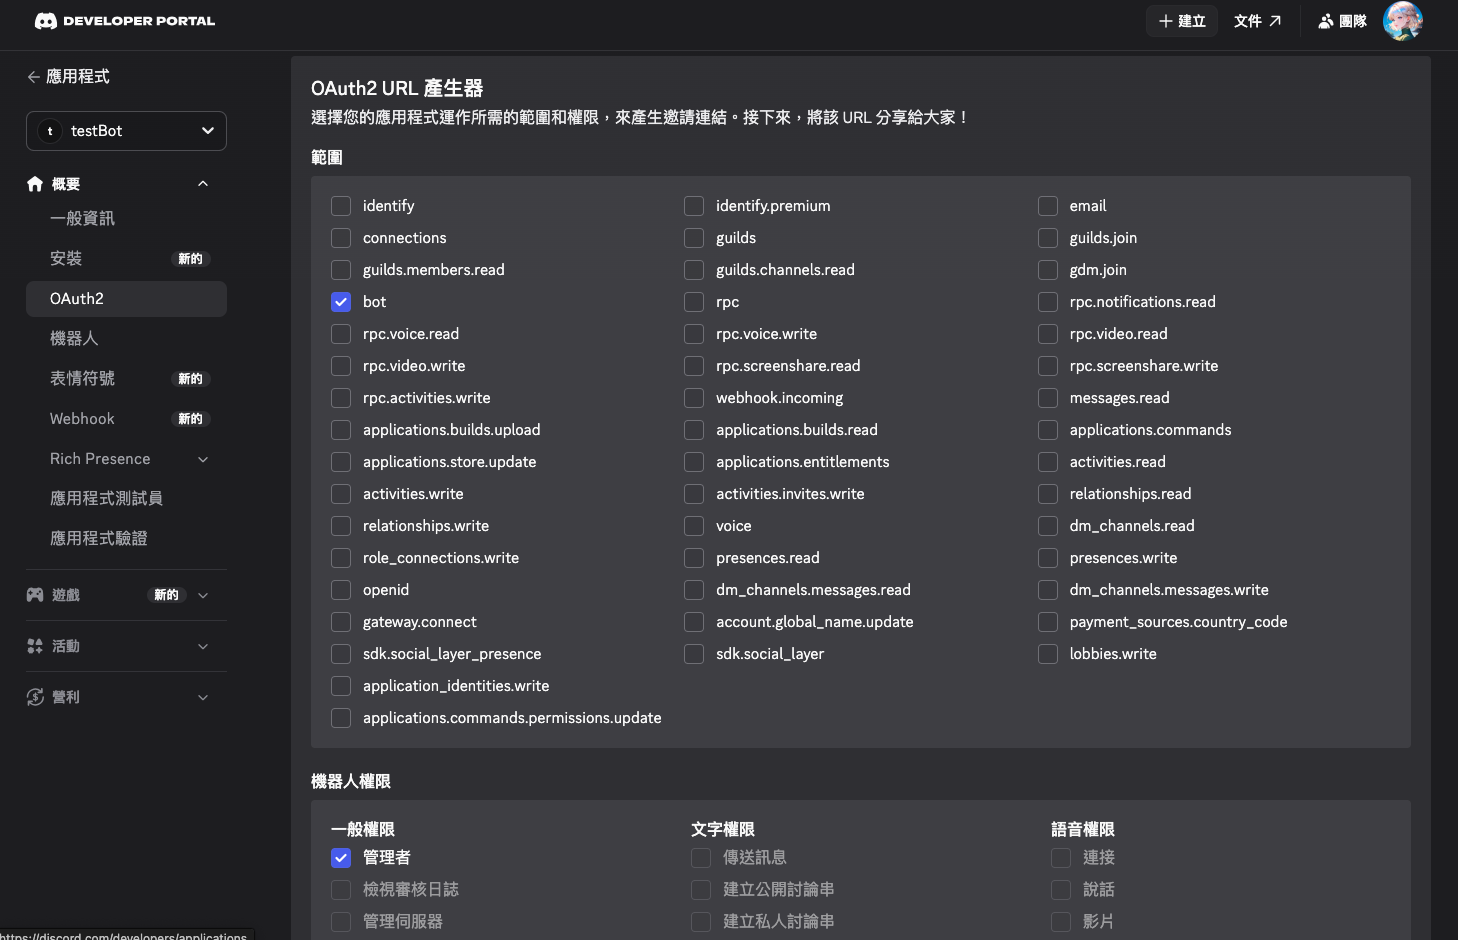
- 複製下方產生的 URL,貼到瀏覽器

- 選擇你的伺服器,按授權
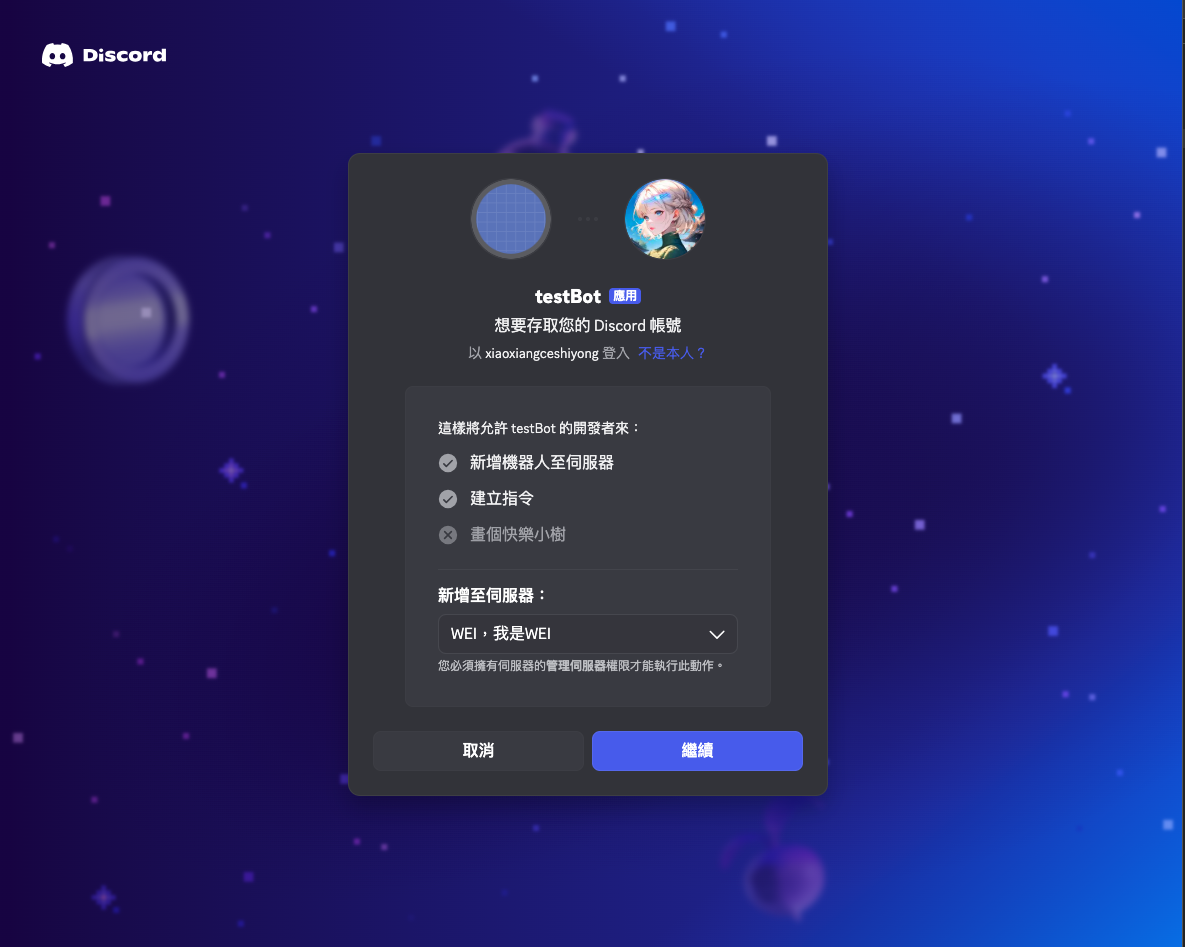
授權完成後,你的伺服器成員列表就會出現這隻 Bot(目前顯示離線,等程式啟動後才會上線)。
applications.commands 和 bot 都要勾選:bot 讓 Bot 加進伺服器,applications.commands 才能讓 Bot 在該伺服器建立和使用 Slash Command,少了前者 Bot 進不來,少了後者指令無法運作。
4. 建立專案 + 安裝依賴
mkdir my-discord-bot && cd my-discord-bot
npm init -y
npm install discord.js dotenv修改 package.json,加入 "type": "module" 改用 ES Modules:
{
  "type": "module",
  "scripts": {
    "start": "node index.js"
  },
  "dependencies": {
    "discord.js": "^14.18.0",
    "dotenv": "^16.5.0"
  }
}專案架構準備好了,接下來補上環境變數。
5. 設定環境變數
建立 .env,填入 Token 與伺服器 ID:
BOT_TOKEN=你的Bot Token貼在這裡
GUILD_ID=你的伺服器ID貼在這裡如何取得 GUILD_ID:
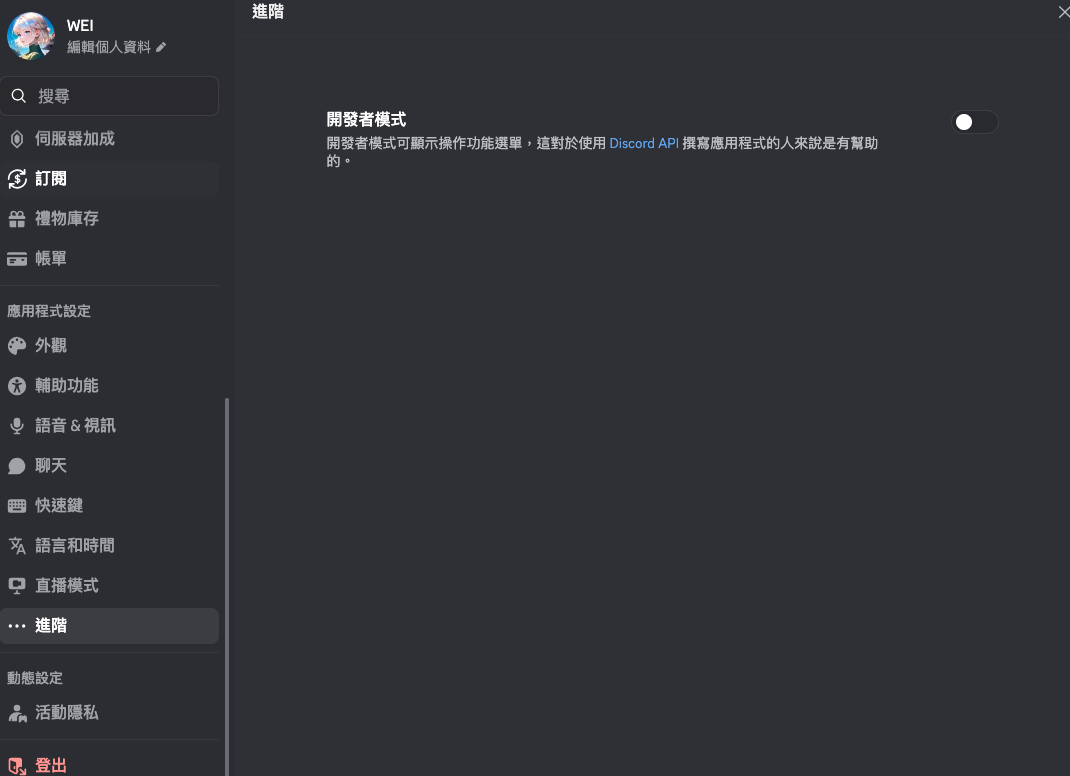
先開啟 Discord 的開發者模式:Discord 設定 → 進階 → 開啟「開發者模式」。
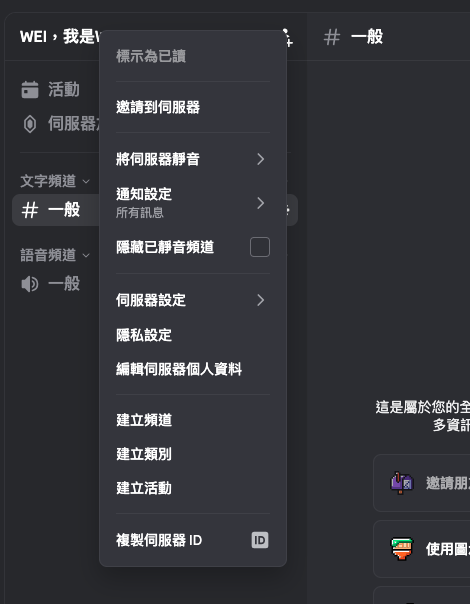
開啟後,右鍵點伺服器名稱就會出現「複製伺服器 ID」選項。
建立 .gitignore,確保 .env 不進版本控制:
.env
node_modules/6. Bot 上線:第一段程式碼
前面的設定都完成後,現在就可以把 Bot 實際啟動起來。
建立 index.js:
import dotenv from "dotenv";
import { Client, GatewayIntentBits } from "discord.js";

dotenv.config();

const client = new Client({
  intents: [
    GatewayIntentBits.Guilds,
    GatewayIntentBits.GuildMembers,
  ],
});

client.once("ready", () => {
  console.log(`✅ Bot 已上線:${client.user.tag}`);
});

client.login(process.env.BOT_TOKEN);執行:
node index.js
# ✅ Bot 已上線:MyBot#1234這時候 Bot 還不能做任何事,但它已經上線了。
7. 第一個 Slash Command
Slash Command 的使用分兩步驟:先向 Discord 註冊指令,再監聽互動事件處理它。
在 client.once("ready") 裡向 Discord 同步指令清單:
client.once("ready", async () => {
  console.log(`✅ Bot 已上線:${client.user.tag}`);

  const guild = await client.guilds.fetch(process.env.GUILD_ID);
  await guild.commands.set([
    {
      name: "ping",
      description: "測試 Bot 是否正常運作",
    },
  ]);

  console.log("📝 指令已更新!");
});再加上 interactionCreate 監聽事件,處理使用者輸入 /ping 時的回應:
client.on("interactionCreate", async (interaction) => {
  if (!interaction.isChatInputCommand()) return;

  if (interaction.commandName === "ping") {
    await interaction.reply("🏓 Pong!Bot 正常運作!");
  }
});完整的 index.js 長這樣:
import dotenv from "dotenv";
import { Client, GatewayIntentBits } from "discord.js";

dotenv.config();

const client = new Client({
  intents: [
    GatewayIntentBits.Guilds,
    GatewayIntentBits.GuildMembers,
  ],
});

client.once("ready", async () => {
  console.log(`✅ Bot 已上線:${client.user.tag}`);

  const guild = await client.guilds.fetch(process.env.GUILD_ID);
  await guild.commands.set([
    {
      name: "ping",
      description: "測試 Bot 是否正常運作",
    },
  ]);
  console.log("📝 指令已更新!");
});

client.on("interactionCreate", async (interaction) => {
  if (!interaction.isChatInputCommand()) return;

  if (interaction.commandName === "ping") {
    await interaction.reply("🏓 Pong!Bot 正常運作!");
  }
});
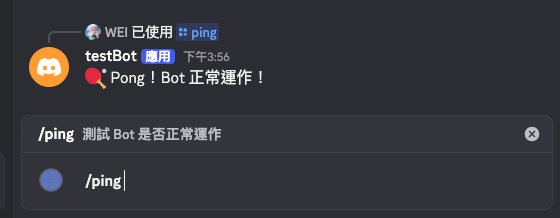
client.login(process.env.BOT_TOKEN);執行後到 Discord 輸入 /ping,Bot 就會回覆 🏓 Pong!
補充:
guild.commands.set()每次都會把 Discord 上的指令清單替換成你傳入的陣列。只有在指令清單有異動(新增、刪除、修改)時才需要呼叫,但每次啟動都呼叫一次也不影響功能,只是稍慢一點。
到這裡,一個能在 Discord 上線並回應指令的 Bot 就完成了。現在所有程式碼都還在 index.js 一個檔案裡,功能簡單還可以,但功能一多就會失控。
下一篇會深入拆解 Slash Commands 的完整設計:帶參數的指令、選項類型、PermissionFlagsBits 權限控制,以及三層互動分流架構。