上一篇的 Button 處理單一確認操作,但如果選項有好幾種,逐一放按鈕就佔版面了。這時候換下拉選單(StringSelectMenu)更適合。
概念:StringSelectMenu vs Button
| Button | StringSelectMenu | |
|---|---|---|
| 適合場景 | 少量固定選項(確認 / 取消 / 2–3 個動作) | 多選項(分類、角色、設定值…) |
| 最多幾個 | 一列 5 個,最多 5 列 | 每個選單最多 25 個選項 |
| 互動方式 | 點擊馬上觸發 | 從列表選擇後觸發 |
| 佔版面 | 每個獨立按鈕都佔一格 | 一個選單折疊成一行 |
實際上兩者常一起用:先用 Select Menu 讓使用者選「做什麼」,再根據選擇回覆帶 Button 的確認訊息。
建立靜態 StringSelectMenu
discord.js v14 用 StringSelectMenuBuilder 搭配 StringSelectMenuOptionBuilder 組合選單,再放進 ActionRowBuilder 送出:
import {
  ActionRowBuilder,
  StringSelectMenuBuilder,
  StringSelectMenuOptionBuilder,
} from "discord.js";

// Slash Command handler:/search 指令觸發時呼叫
async function handleSearch(interaction) {
  const row = new ActionRowBuilder().addComponents(
    new StringSelectMenuBuilder()
      .setCustomId("select_category")
      .setPlaceholder("選擇分類")
      .addOptions(
        new StringSelectMenuOptionBuilder()
          .setLabel("後端")
          .setValue("後端")
          .setDescription("Node.js、Go、Python…"),
        new StringSelectMenuOptionBuilder()
          .setLabel("前端")
          .setValue("前端")
          .setDescription("React、Vue、CSS…"),
        new StringSelectMenuOptionBuilder()
          .setLabel("DevOps")
          .setValue("DevOps")
          .setDescription("Docker、CI/CD、K8s…")
      )
  );

  await interaction.reply({
    content: "請選擇分類:",
    components: [row],
    flags: 64, // ephemeral,只有本人看到
  });
}setCustomId 是這個選單的識別碼,稍後在 interactionCreate 裡用它來對應到正確的 handler。setPlaceholder 是選單折疊時顯示的提示文字。

點擊後展開,每個選項連同灰字說明一起顯示:
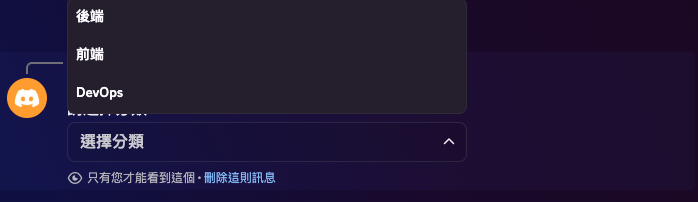
每個 option 有三個欄位:
setLabel()— 使用者看到的文字(必填)setValue()— 程式拿到的值(必填,要唯一)setDescription()— 灰字說明(選填)setEmoji()— 可以加 emoji(選填)
isStringSelectMenu():接收選單事件
使用者選完後,interactionCreate 觸發,用 interaction.isStringSelectMenu() 判斷:
client.on("interactionCreate", async (interaction) => {

  if (interaction.isStringSelectMenu()) {
    const { customId } = interaction;

    if (customId === "select_category") {
      return handleCategorySelect(interaction);
    }
    return;
  }

  // ...
});handler 裡用 interaction.values 取得使用者選的值(陣列,因為可以開啟多選):
async function handleCategorySelect(interaction) {
  const [category] = interaction.values; // 單選取第一個

  await interaction.update({
    content: `你選了「${category}」,正在處理...`,
    components: [],
  });

  // 後續處理邏輯(下一節會擴充成兩段式確認流程)
}
動態選項:從外部資料建立
選項不一定要硬寫死。從 Sheets 或其他來源動態組選項:
async function buildCategoryMenu() {
  const rows = await getCategoryList(); // [["後端"], ["前端"], ["DevOps"]]

  const options = rows
    .map((row) => row[0]?.trim())
    .filter(Boolean)
    .map((name) =>
      new StringSelectMenuOptionBuilder().setLabel(name).setValue(name)
    );

  return new ActionRowBuilder().addComponents(
    new StringSelectMenuBuilder()
      .setCustomId("select_category")
      .setPlaceholder("選擇分類")
      .addOptions(options)
  );
}使用時:
if (commandName === "search") {
  const row = await buildCategoryMenu();
  await interaction.reply({ content: "請選擇分類:", components: [row], flags: 64 });
}注意:StringSelectMenu 的選項最多 25 個,上限和 Slash Command 的 choices 一樣。超過就需要改用 Autocomplete 或分頁的設計。
多選模式
預設是單選,可以用 setMinValues 和 setMaxValues 開啟多選:
new StringSelectMenuBuilder()
  .setCustomId("select_tags")
  .setPlaceholder("選擇標籤(最多 3 個)")
  .setMinValues(1)
  .setMaxValues(3)
.addOptions(options)interaction.values 此時會是選了多少就多長的陣列。
和 Button 搭配:兩段式互動
最常見的模式是:選單選擇 → 確認按鈕。ButtonBuilder 和 ButtonStyle 需要補進 import:
import {
  ActionRowBuilder,
  StringSelectMenuBuilder, StringSelectMenuOptionBuilder,
  ButtonBuilder, ButtonStyle,
} from "discord.js";第一步:使用者從選單選完後,Bot 將訊息改為確認按鈕:
async function handleCategorySelect(interaction) {
  const [category] = interaction.values;

  const confirmRow = new ActionRowBuilder().addComponents(
    new ButtonBuilder()
      .setCustomId(`confirm_search_${category}`)
      .setLabel(`搜尋「${category}」`)
      .setStyle(ButtonStyle.Primary),
    new ButtonBuilder()
      .setCustomId("cancel_search")
      .setLabel("取消")
      .setStyle(ButtonStyle.Secondary)
  );

  await interaction.update({
    content: `確定要搜尋分類「${category}」嗎?`,
    components: [confirmRow],
  });
}
第二步:使用者按下確認,Bot 查詢並回覆結果:
async function handleConfirmSearch(interaction, category) {
  await interaction.deferUpdate(); // 先告訴 Discord「正在處理」,避免 3 秒逾時

  const results = await searchByCategory(category); // 換成你的資料查詢邏輯

  await interaction.editReply({
    content: results.length
      ? `找到 ${results.length} 筆結果:\n${results.join("\n")}`
      : "沒有找到相關結果。",
    components: [],
  });
}

async function handleCancelSearch(interaction) {
  await interaction.update({ content: "已取消。", components: [] });
}interaction.deferUpdate() 的作用類似 deferReply,告訴 Discord「我正在處理,先維持現在的畫面」,避免 3 秒逾時。處理完後用 editReply 更新訊息。与 deferReply 的差異在於:deferUpdate 用在元件互動(Button / SelectMenu),不會另外回一則新訊息,而是就地更新原訊息。
完整流程總覽
client.once("ready")
  └── guild.commands.set(COMMANDS)   ← 把 /search 註冊到 Discord

使用者輸入 /search
  └── interactionCreate → isChatInputCommand() → commandName === "search"
        └── buildCategoryMenu() + interaction.reply({ components: [row] })
              └── 使用者看到下拉選單

使用者選擇分類
  └── interactionCreate → isStringSelectMenu() → customId === "select_category"
        └── handleCategorySelect(interaction)
              └── interaction.update({ components: [confirmRow] })
                    └── 使用者看到確認按鈕

使用者按下確認
  └── interactionCreate → isButton() → customId.startsWith("confirm_search_")
        └── handleConfirmSearch(interaction, category)
              └── interaction.deferUpdate()
              └── searchByCategory(category)
              └── interaction.editReply({ content: 結果, components: [] })
完整骨架總結
把這篇所有概念組合在一起,index.js 的下拉選單互動結構長這樣:
import {
  Client, GatewayIntentBits,
  ActionRowBuilder,
  StringSelectMenuBuilder, StringSelectMenuOptionBuilder,
  ButtonBuilder, ButtonStyle,
} from "discord.js";
import "dotenv/config";

const client = new Client({
  intents: [GatewayIntentBits.Guilds, GatewayIntentBits.GuildMembers],
});

// ── 1. 指令定義 ──────────────────────────────────────────────
const COMMANDS = [
  { name: "search", description: "依分類搜尋" },
];

// ── 2. ready:註冊指令 ────────────────────────────────────────
client.once("ready", async () => {
  const guild = await client.guilds.fetch(process.env.GUILD_ID);
  await guild.commands.set(COMMANDS);
  console.log("✅ Bot 上線,指令已更新");
});

// ── 3. 動態選單建立(從 Sheets 或其他資料來源讀取) ────────────
async function getCategoryList() {
  // mock:換成你的資料來源,例如從 Google Sheets 讀取
  return [["後端"], ["前端"], ["DevOps"]];
}

async function buildCategoryMenu() {
  const rows = await getCategoryList();
  const options = rows
    .map((r) => r[0]?.trim())
    .filter(Boolean)
    .map((name) => new StringSelectMenuOptionBuilder().setLabel(name).setValue(name));

  return new ActionRowBuilder().addComponents(
    new StringSelectMenuBuilder()
      .setCustomId("select_category")
      .setPlaceholder("選擇分類")
      .addOptions(options)
  );
}

// ── 4. interactionCreate:Select Menu + Button 分流 ──────────
client.on("interactionCreate", async (interaction) => {

  // 第一層:下拉選單
  if (interaction.isStringSelectMenu()) {
    if (interaction.customId === "select_category") return handleCategorySelect(interaction);
    return;
  }

  // 第二層:按鈕(select menu 選完後的確認 / 取消)
  if (interaction.isButton()) {
    if (interaction.customId.startsWith("confirm_search_")) {
      const category = interaction.customId.replace("confirm_search_", "");
      return handleConfirmSearch(interaction, category);
    }
    if (interaction.customId === "cancel_search") return handleCancelSearch(interaction);
    return;
  }

  // 第三層:Slash Command
  if (!interaction.isChatInputCommand()) return;
  if (interaction.commandName === "search") {
    const row = await buildCategoryMenu();
    await interaction.reply({ content: "請選擇分類:", components: [row], flags: 64 });
  }
});

// ── 5. handler:第一步,選完 → 顯示確認按鈕 ─────────────────
async function handleCategorySelect(interaction) {
  const [category] = interaction.values;

  const confirmRow = new ActionRowBuilder().addComponents(
    new ButtonBuilder()
      .setCustomId(`confirm_search_${category}`)
      .setLabel(`搜尋「${category}」`)
      .setStyle(ButtonStyle.Primary),
    new ButtonBuilder()
      .setCustomId("cancel_search")
      .setLabel("取消")
      .setStyle(ButtonStyle.Secondary)
  );

  await interaction.update({
    content: `確定要搜尋分類「${category}」嗎?`,
    components: [confirmRow],
  });
}

// ── 6. handler:第二步,確認 → 查詢並回覆結果 ───────────────
async function handleConfirmSearch(interaction, category) {
  await interaction.deferUpdate();

  const results = await searchByCategory(category); // 換成你的資料查詢邏輯

  await interaction.editReply({
    content: results.length
      ? `找到 ${results.length} 筆結果:\n${results.join("\n")}`
      : "沒有找到相關結果。",
    components: [],
  });
}

async function handleCancelSearch(interaction) {
  await interaction.update({ content: "已取消。", components: [] });
}

client.login(process.env.BOT_TOKEN);核心模式是:指令觸發 → reply 附帶選單 → 使用者選擇 → isStringSelectMenu() 路由 → update() 換成確認按鈕 → isButton() 路由 → deferUpdate() + editReply() 回傳結果。
到這裡,discord.js 的三種主要互動——Slash Commands、Button、StringSelectMenu——都有了基礎設計。實際的 Bot 功能幾乎都是這三種組合出來的。
下一篇會介紹 Embed:用 EmbedBuilder 打造有顏色條、標題、欄位的結構化訊息,讓 Bot 回應從純文字升級為清晰易讀的卡片格式。